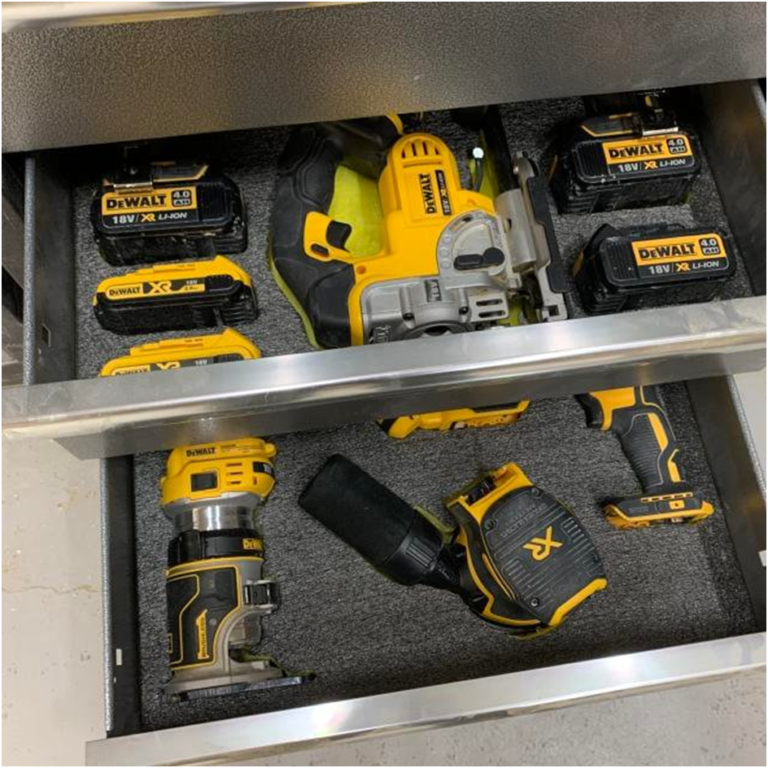
If you’re tired of digging through cluttered toolboxes or struggling to find the right tool for the job, foam inserts might be the solution you’ve been looking for. Let’s explore innovative ways to use foam inserts to organize your Dewalt tools and streamline your workspace.
Customized Tool Silhouettes
One of the most influential and visually appealing ways to organize your tools is by creating custom tool silhouettes on foam inserts. By tracing the outline of each tool onto the foam and cutting out the shapes, you can create a customized storage solution that ensures every tool has its place. Not only does this make it easy to identify missing tools quickly, but it also adds a touch of personalization to your toolbox. Whether you prefer a minimalist approach or want to get creative with detailed silhouettes, the possibilities are endless. Check out ShadowFoam products for Dewalt to get started.
Multi-Layered Foam Inserts
If you’re short on space but have an extensive collection of tools to organize, multi-layered foam inserts are a game-changer. Stacking layers of foam inserts inside your toolbox allows you to maximize storage space without sacrificing organization. Start by designing each layer to accommodate specific tool categories or sizes, then carefully cut out the foam to create custom compartments. With multi-layered foam inserts, you can keep your tools neatly organized and easily accessible, even in a compact toolbox.
Portable Tool Trays
Portable tool trays are a must-have accessory for on-the-go projects or job sites. With foam inserts, you can create custom trays that fit inside your toolbox or bag, keeping your tools organized and secure during transportation. Start by measuring the dimensions of your toolbox or bag, then design foam inserts that fit snugly inside. Cut out compartments for each tool, leaving enough space for easy removal and reinsertion. With portable tool trays, you can take your tools wherever you go without worrying about them getting damaged or misplaced.
How to Use Dewalt Toolbox Foam Inserts
Are you excited to organize your Dewalt toolbox? It’s frustrating to hear your tools clunking together and worrying about whether they’re getting damaged. With foam inserts, this can be put to rest. Here is a simple guide on customizing your foam inserts so they’re ready for your Dewalt toolbox.
Gather Your Tools
There are a few things you’ll need to cut your foam inserts. First, you will need a scalpel, which features a sharp blade. This will be used to trace around the tools. Then, it’s advised that you have a pair of safety gloves. This can help you grip the tools and ensure you don’t cut yourself on the blade. It’s useful to have a cutting mat so that you don’t score the surface you’re working on.
Of course, don’t forget to have your Dewalt foam insert ready. Purchase this in advance, and you can select a pre-made size for your toolbox. This saves the hassle of cutting it to size or making a mistake if it doesn’t fit correctly.
Choose the Layout
Don’t make the mistake of cutting out your first tool on a whim. You must take time to plan the design and ensure you can fit all of your tools onto the foam insert. This means playing around with the layout, choosing what tools to group together and what position they should be in. You want to utilise all of the available space. Therefore, lay out all of your tools before you start cutting. Take a photo of the final design to remember where everything goes.
Enjoy the First Cut
You might be apprehensive about making the first into the Dewalt foam insert. So, it’s crucial to take your time. Place a tool with a simple design onto the foam. You’ll be wearing your safety gloves, holding down on the tool with one hand and having the scalpel in the other. Trace around the tool carefully and slowly, ensuring you’re close to it and cutting into the foam. Once this is done, remove the tool.
Now, it’s time to go around the outline again and select the right depth. Consider the tool’s shape and how far you want it into the foam. Normally, it’s a good idea to have it flush with the top. You might have to vary the depth in places to account for the tool you have. For example, a screwdriver might need more depth in terms of where the handle is. Then, all you have to do is peel away the foam you want to disregard.
Conclusion
Organising your tools doesn’t have to be a chore. With foam inserts, you can create customised storage solutions that keep your tools neat, organised, and easily accessible. Whether you opt for custom tool silhouettes, multi-layered foam inserts or portable tool trays, the key is to find what works best for your needs and preferences. So why wait?

